 Serving the Portland Metro

Skylights in the Pacific Northwest: More Daylight, Less Guesswork
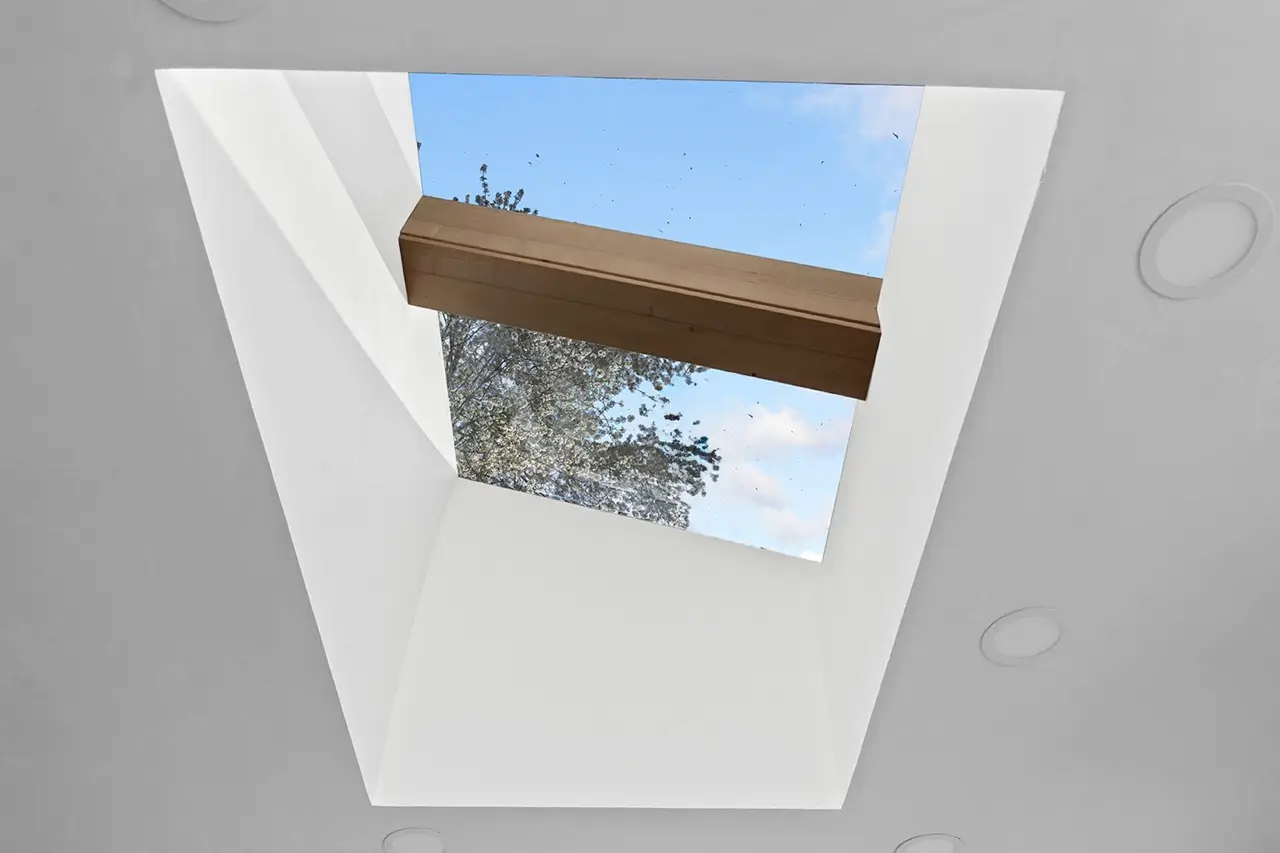
If you live in the PNW, you know the drill: long gray seasons, short winter days, and rooms that could use a little lift. That’s where skylights shine—literally. They bring light and brighten the area, pull sunshine into the center of the home, and make spaces feel taller, fresher, and calmer.
Why skylights work so well here
- PNW light = soft and diffuse. Skylights catch that steady glow and spread it deeper into the house than wall windows can.
- They visually lift the ceiling. Even a modest unit makes a standard 8–9' ceiling feel airier.
- They help both big and small rooms.
- Large areas: skylights bring light to the middle of the room—perfect for great rooms and open kitchens where perimeter windows can’t reach.
- Small spaces: bathrooms, hallways, closets—skylights illuminate the space without stealing wall area.
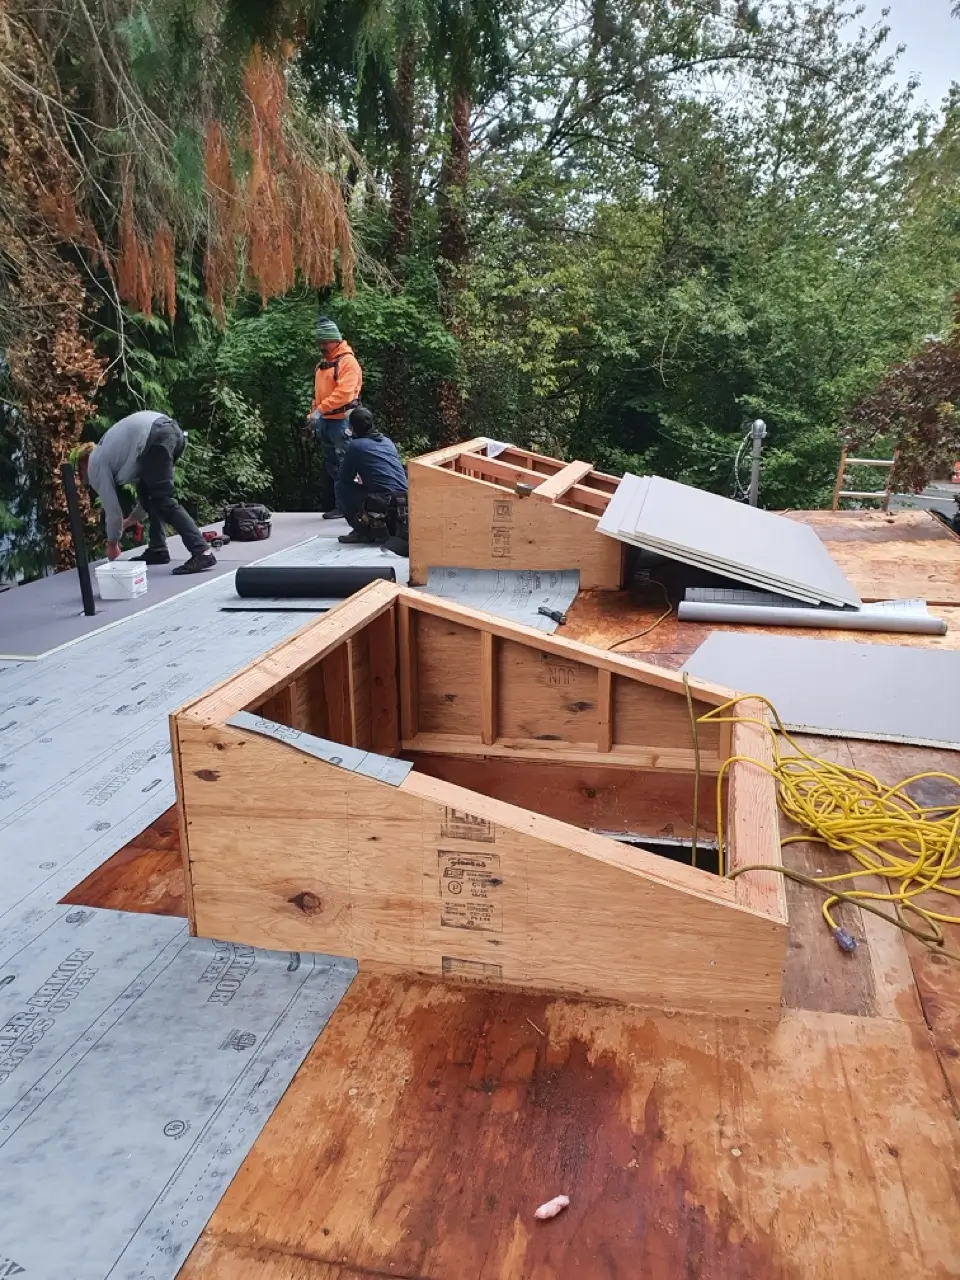
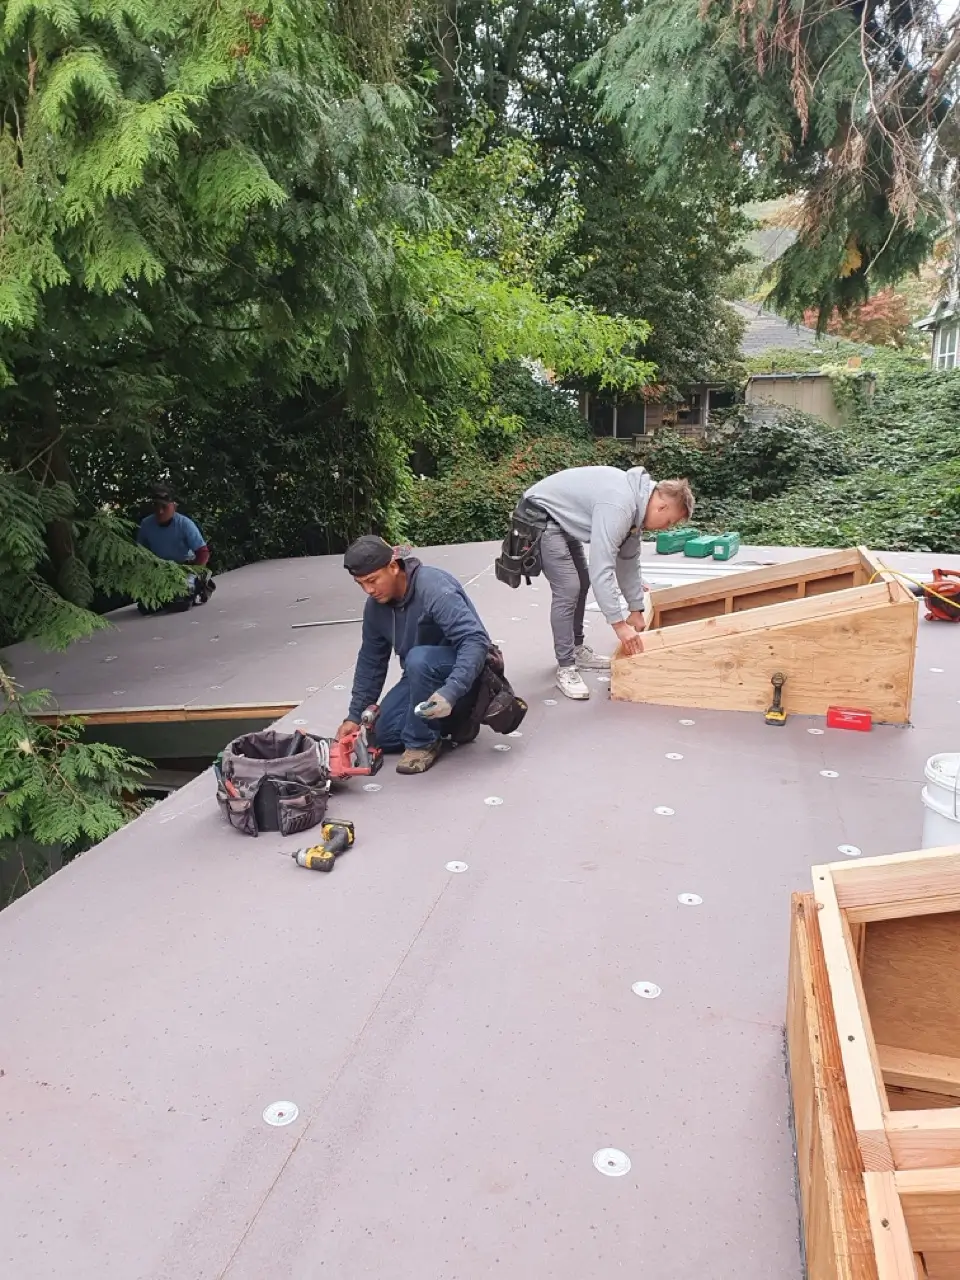
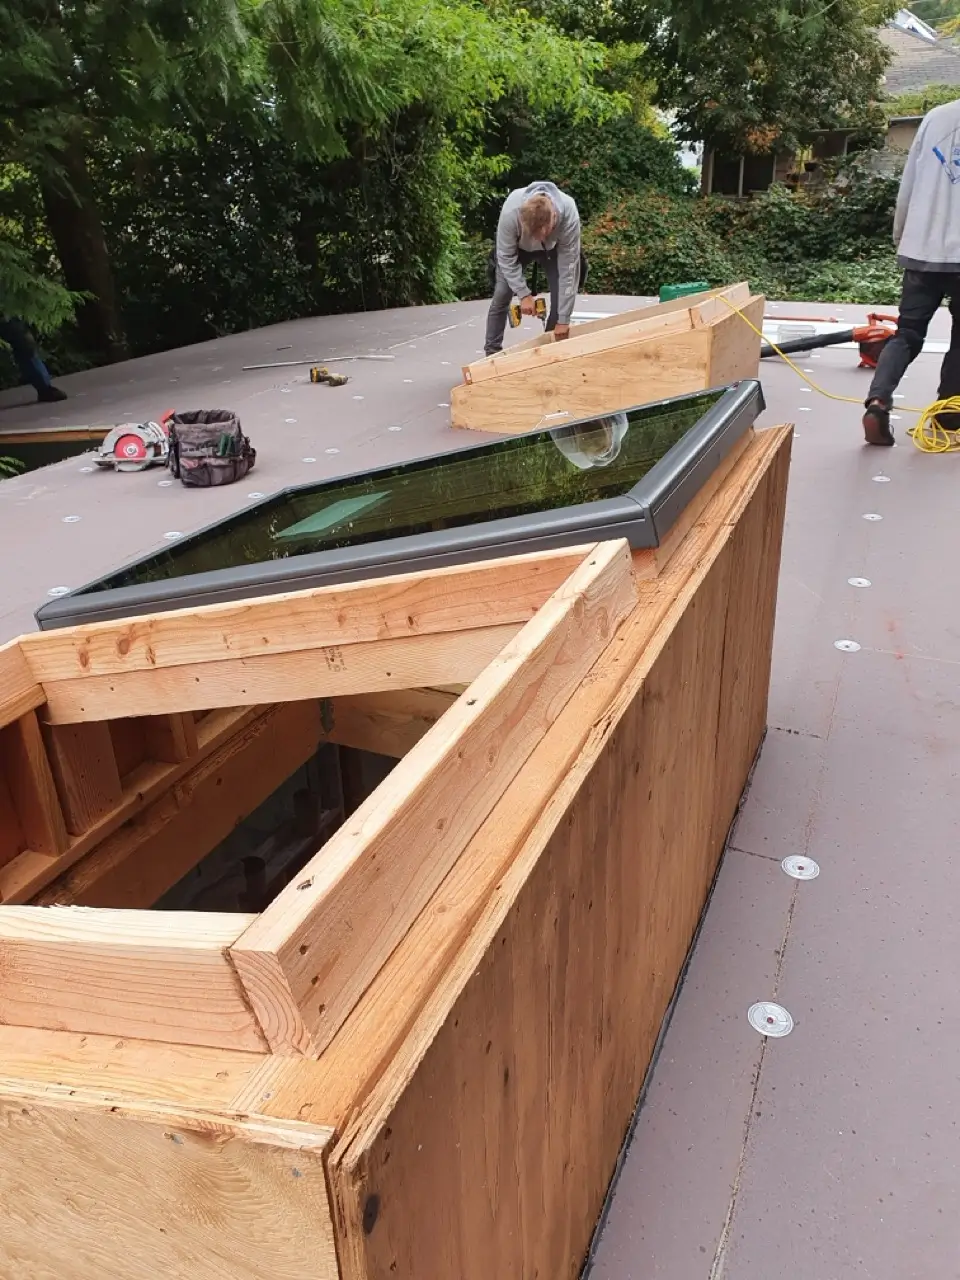
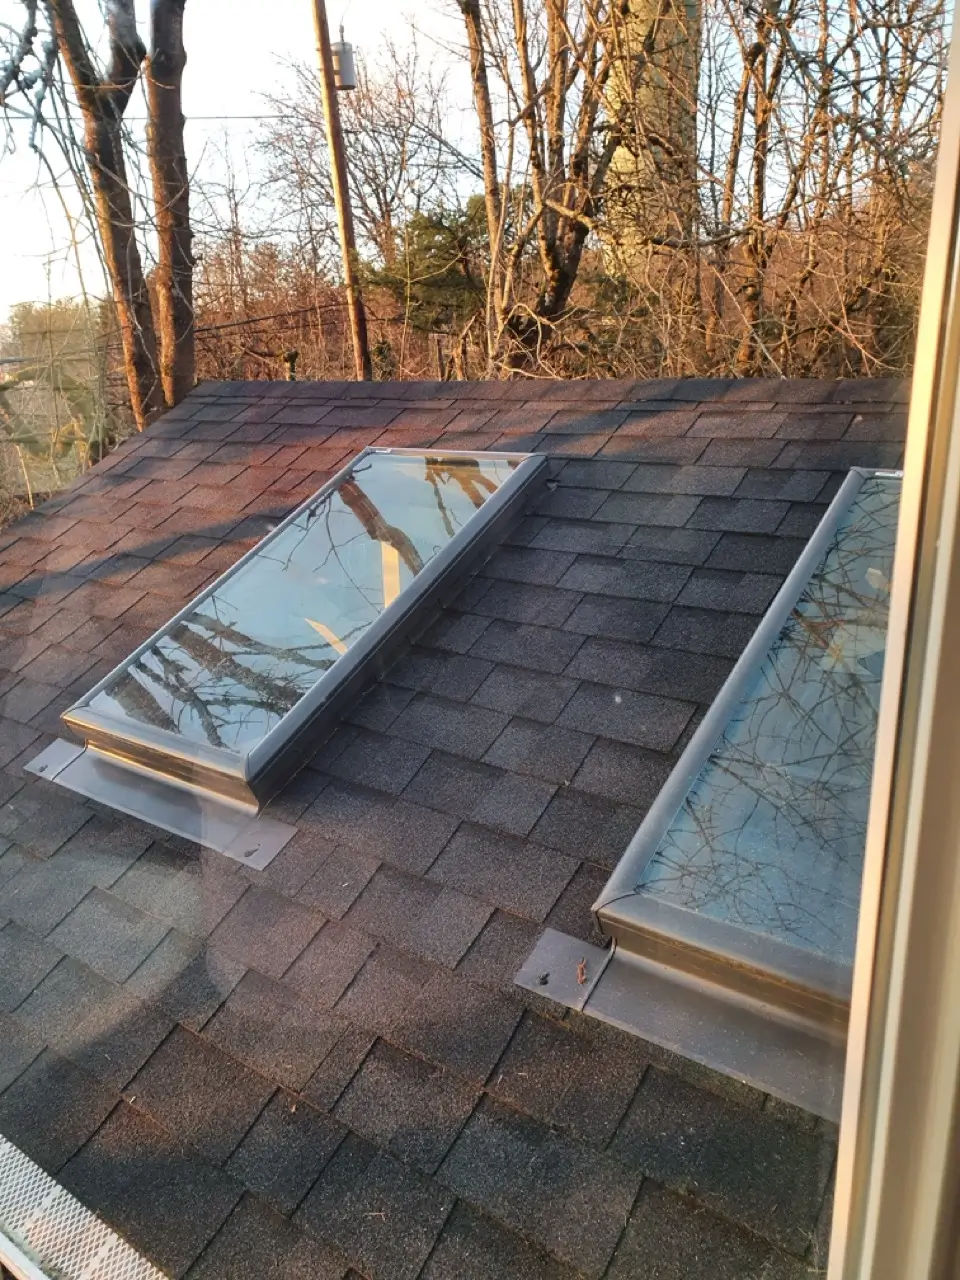
- They’re PNW-proof when done right. With proper flashing and underlayment, skylights hold up beautifully through our rain, wind, and occasional snow.
This year, we installed skylights at the beach, in the mountains of Oregon, and across Portland—and the day-to-night difference has been huge in every setting.
Best places to use them
- Kitchens & great rooms: one or two mid-sized units centered over the island or seating area pulls daylight to the core.
- Bathrooms: privacy + daylight; add a vented unit for steam control.
- Hallways & stairs: a single skylight can turn a dark pass-through into a showpiece.
- Home offices: north-facing or diffused light reduces glare on screens.
Types (quick guide)
- Fixed skylight: most efficient, no moving parts. Great for living rooms and hallways.
- Vented skylight (manual or solar): opens for airflow—bathrooms, kitchens, lofts.
- Sun tunnel / solar tube: small footprint, big punch for closets, interior baths, pantries.
- Roof window: opens like a window; ideal for finished attics with reachable units.
Glass & energy (what to choose in the PNW)
- Low-E, argon-filled glass is the standard now—great at keeping winter heat in while letting in visible light.
- Look for U-factor ≤ 0.30 for better insulation and a moderate SHGC (you want light without summer hot spots).
- Laminated inner pane for safety + sound dampening (nice near the coast or under flight paths).
Placement & sizing tips
- North = even, all-day light (the PNW favorite).
- East/West = brighter mornings/evenings (add shades if needed).
- South = warmest; pair with Low-E and blinds.
Coast vs. mountains vs. Portland (install details that matter)
“But do skylights leak?”
They don’t when installed correctly. Our leak-proofing stack looks like this:
Extras you’ll actually use
Permits, timeline, and disruption
Cost factors (ballpark guidance)
Size, roof type (asphalt vs. metal), fixed vs. vented, shaft length, and interior finishing all affect price. We give a fixed, line-item estimate so you can see where each dollar goes—no surprises.
________________________________________________________________
Skylights are one of the highest-impact upgrades you can make in the Pacific Northwest – at the cost, in town and in the Cascade mountains. They brighten the area, lift the ceiling, and bring natural light where windows can’t—whether it’s a coastal bungalow, a mountain cabin, or a Portland Craftsman. We’ve installed them in all of these places this year, and the before/after difference is night and day.
Want help choosing size, placement, and the right flashing kit for your roof? We can assess your home and map out the best option—end to end, leak-free.
 +1 503-805-7925